Showing posts with label Projects. Show all posts

Monday, March 14, 2011

Why Wait?

One of my sweet friends saw the embroidered dishtowels I had posted on FB recently and said something to the effect of "I'd love something special like that when I get married."

And that comment broke my little heart- why do us single gals put off the joys in life simply because we don't have a special someone?

So I asked her what her desired future kitchen colors were and made her a matching suite of embroidered dishtowels, towels, and a hotpad:


Sometimes the rules of life make me laugh- I'm not allowed to have matching, nice or cute things because I'm single and haven't had a bridal or baby shower? Where did I sign up for that?

Sometimes I swear I'm going to start throwing showers for my single galpals and myself...um, we like nice things too! Do we not matter?

It's all too easy to put off happiness and say "Well I'll have a cute kitchen when I'm married" or "Well I'll be happy when I'm married" or "I'll be happy when I have kids." But what in the meantime? You should allow yourself to be happy now. You are a worthwhile person now. Don't waste your time here on earth just because you're single and/or childless. Life's too short for that. It's easy to focus too much on the future and forget about today.

I don't discriminate- I made a different set of kitchen stuff for my friend who got married. Her desired kitchen colors were red, green, black and tan. She is in her early 30's and just married a great guy in the temple- gotta reward that.


So married or single, have a cute kitchen and seize the day.

Wednesday, November 17, 2010

Lace Box

The third project in Metals class was to make a box. So I thought "Oh, a camera box would be fun- I'll have lots of time to make something more complicated" and designed this:


I was really tempted to make it in paper and call it good! The front part would come out like a drawer and house some little photo artifacts of bygone days- BD, or Before Digital. There would be a little hook and eye to keep the drawer shut. And maybe a back piece that opened to show an old photo.

So I started on that, rollerprinting copper with a canvas texture. But I didn't get far- I'd forget my toolbox or forget stuff in the car. One day I sent half an hour searching for the metal I'd prepared, only to find it hiding in my backpack- I thought I was going crazy!

And then I hit other snags- like Mom in the hospital. And me being sick. And Hanky needing surgery. And then it became a matter of getting something done to turn in.

Crit was terrible- no one had anything finished. Including me. That doesn't happen. I was disappointed and embarrassed. But I got an extension to turn it in after the weekend and busted my butt to finish it in time.

It's a little harder to make square boxes then round boxes so I redesigned and made this:


I was inspired by the pin/earring/necklace pewter boxes that I had as a child. Those were a bit hokey though. I rollerprinted lace into the copper. I soldered and made a lid and base that actually fit together pretty well (you can't see the ring on the underside of the lid) which is a bit tricky with metal. The flowers are not permanently attached, you can take them off and wear them as pins. I rollered the copper to be thin, cut out my shapes, filed the edges and then hammered the edges to make them even thinner. Then I used a dappling block (a metal cube with different sizes of bowl shapes cut out of it) to hammer my flat shapes into a cupped flower shape.

There are holes drilled in the walls of the base so that one can string it and wear it as a pendant if desired. I didn't have time to add anything inside, but maybe I'll put a flower in there in the future. I applied patina and sanded it away just enough to really show the lace pattern. I sanded the edges and bottom to make them a brighter color for contrast.

Overall, I like my box and I'd like to do my camera still. I'm pleased that I figured out on my own how to solder the flowers and that it worked! I strung the flowers onto the wire and hung them upside down from steel cross-locking tweezers and applied solder to where the wire met the bottom flower. It flowed and worked! Then I had to twist the wire to work harden it, the heat from the torch anneals it to make it soft and you can't have a floppy pin back or it will bend and break. Then I filed the ends to be pointy enough to go through a shirt (but not too pointy!). They're held in the lid with little chunks of eraser for now.

I have a good amount of lace-textured copper left over- I should make a bracelet or something with it. I think it's pretty funny to make such girly stuff with non-girly materials and tools- metal and files and hammers and whatnot.

It's fun making stuff with big girl toys- like torches!

Friday, November 5, 2010

Gaga Ooh La La

Halloween weekend I went down to the Tuckahoe YSA conference down by Harrisburg for some fun. I went to this conference last year and had fun and this year they extended it to Sunday which made it a bit easier for us driving so far (five hours!). The whole event took place at a Boy Scout camp.

I got to be a princess and stay in a castle:


Your mother was a hamster and your father smelled of elderberries!
Couldn't resist.


Friday was games and food and there was a fun bonfire, too. I really need to watch the things that come out of my mouth when it's late and I'm tired, lol!

 Kristen, Miranda, me and Laura having girl talk

On Saturday, we had a really great speaker, Brother Toma. He even sang for us, too. He talked about missionary work and it was great. Very spiritual. So many inspiring stories- you really never can guess who will join the church! You also can't be discouraged when something doesn't happen right away. If you recall Elder Nelson's talk in conference, it was Brother Toma's dad that he said would join the church and then offered to seal Brother Toma's mother and father. Ten years later, the dad joined the church and Elder Nelson did seal them.

So, we need to Speak, Ask, Live the gospel and Testify. After Brother Toma there was a panel of  bishops/stake presidents that answered submitted questions. It was good, though I kindof wished there had been a woman's perspective offered. I also wanted to answer when someone had submitted the question "I'm 30, why do I feel old?" Hey! We're not old! Quit comparing yourself to others! Don't listen to those who think you're nothing if you didn't get married by age 22!

Later on there were activities- I didn't care about the obstacle course or ziplining (a bunch of people got hurt ziplining so it was a good thing I didn't go cause I'm such a klutz!) so I stayed at the main cabin and carved a wicked awesome pumpkin:


I like how it glows:


So what was I for the Halloween dance?


Lady Gaga!


I know her music is way naughty, but I get a big kick out of her crazy costumes and thought it would be fun to design and make my own. You know someone is having fun making all those crazy things for her to wear! I decided if I was going to do this, then it had to be this year cause who knows how much longer she'll be popular! I actually wish I'd done this costume even crazier!

It took 5 rolls of duct tape (it comes in any color- sweet!), 3 T-shirts as the base of the overpiece, a wig and spray-painted shoes! I also found red polka dotted eyelashes! When I found these pants for $3 at Goodwill, it was a sign to do this costume! I collect fake eyelashes- I love wearing them, the crazier the better and this was a good opportunity to wear some! The trick was to do a modest costume- a challenge since she often wears leotards!

It was funny because most people understood what I was but some people thought that I was Fire or they'd never heard of Lady Gaga before...I was like, What rock are you living under?? I don't have tv or internet and I know full well who she is!


My pal Ivan and I both showed up in red duct tape (he's a tetris piece and had two buddies in other shapes/colors)...good minds think alike! Pretty redneck to make a costume out of duct tape, huh?


My galpals from my stake

These pics don't show it well, but I have these flamelike appendages coming off of my front. The outfit weighed a ton and was hot to wear but I had fun. The top and skirt were separate pieces so I could move and actually sit down. I had wanted to attach red hula hoops to me but the ability to sit down won out.

Me and my friend Jared

Oh, and I had "You and Me could write a Bad Romance" written on my back...I was at a YSA conference, after all! I don't think anybody saw it because the T-shirt crinkled up in the back. It was my own secret joke to myself- there's very little dating potential at these things!

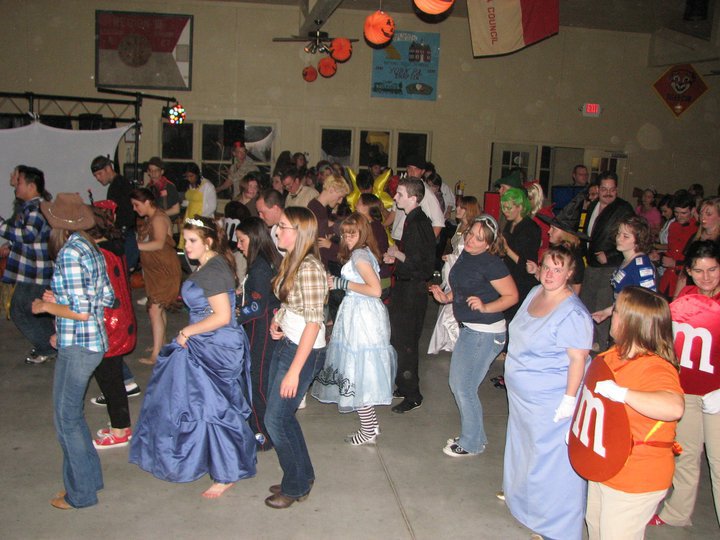
There were lots of really great costumes at the dance, almost everyone dressed up. There were a group of girl M&Ms, Jack and Rose from Titanic, The Morton Salt girl, a peacock with a real peacock feather tail, the Red Queen, a Mountie (who is really Canadian!) and a bunch of other fun ones. I have a bunch of ideas swimming in my head for next year, I don't know which one will win!


Sunday was church there at the camp with a testimony meeting, it was nice. In all, I had a lot of fun being a big goofball this weekend and seeing people that I don't get to see all the time. A good mix of spiritual uplift and fun- which I needed.

Mental note: Next year make a figure flattering costume! Red duct tape does not help so much!

Thursday, October 28, 2010

Girly Spider Webs

I can't claim to have come up with this idea, I saw the idea here on Betz White's craft blog and decided to try it myself. Out here it's pretty easy to find inexpensive (PA has plentiful antique malls and junk stores, I love it) handmade doily items, so I found some that were cute but that I wouldn't be pained to cut up.

So you take your doilies...

...and find some wooden embroidery hoops. Paint the outer hoop black and leave the inner one natural.

Add some ribbon and spiders and voila!


You get some pretty easy and fast girly Halloween decorations!
I used an 8" hoop on the square doily, and got a 6" and two 3" hoops from the rectangular one.
I wanted to make my own beaded spiders, but that didn't happen this year.

I think they're cute enough to have up all year- sans spiders!


I like decorating my hutch!

You like my little cast iron stove?

Have a Happy Halloween!

Monday, October 25, 2010

Thrift Store Spooky

I found these candelabras for literally $3 for the pair at a local thrift store. But what to do with them? They were almost cool, but not quite. They were pretty ugly in their original state- the center posts weren't even metal, but cheaply painted grey plastic. The arms were of some kind of base metal, definitely not the good stuff. And there was some sort of heavy stone at the bottom (you do not want to get socked in the head with one of these!). But I looked past all that and saw some potential.


 I took my happy can of black glossy spray paint, and voila!

Insta-macabre:


Painting them (it took several tries- lots of nooks and crannies!) makes the pieces more about their form then colors. I love how they turned out- I don't want to put them away!

I also love having an old beat up black piano- perfect for scenes like this! Usually we put the headstones outdoors, but this year I leaned them against the wall and added my spooky cloth (love $1 stores!), crows and my glitter skull. I like my Halloween to be a bit glam.

I so love Halloween- if I had oodles of $, you know what I'd do? I'd buy some big old cool spooky looking house (I'd own a bunch of houses) and devote it solely to Halloween. I'd have so much fun making it over into a deliciously spooky haunted mansion of my own. And I'd let people tour it, too. And so what if the shutters droop and the paint peels and there's cobwebs inside? It's a Halloween house, for crying out loud! That's the dream.

That, and a house devoted to Christmas.

Wednesday, October 20, 2010

Oh Snap!

So the second project in my metals class was to make a ring or a pin or a pendant. You had to sweat solder an element, which is soldering a flat piece of metal to another flat piece of metal. You were to use your 1x3" sheet of sterling silver (you could add copper if you wanted, brass does not bond well to real silver) which costs $22 (versus $8 for 6x6"of copper) and was a little nerve wracking to cut into.

I was pretty busy at this point in time and nothing fabulous came to me so I went with the best idea I had- a camera ring:


I cut out a teeny tiny camera shape (with flashbulb), hammered the flashbulb into a rounded shape, and sweat soldered it to the band while it was still in strip form. I textured the camera and the band. Then comes the challenging part: aligning the ends of the band perfectly so there's no gap and soldering the ring together without undoing what I'd already soldered. Whew, I did it!

People got a kick out of having this on the side, wish I had an exclamation point stamp:


The other side had some random texture- what I'd tried for (hammering "film holes" didn't work so it just became this:

And I "signed" it with an E. It still cracks me up when people ask why there's an E on my things....HELLO!

Then there was filing/clean up work and I antiqued it with liver of sulfur so you could see the texture and lettering.

I was sick for part of this project, so I missed some work time. And I wasn't terribly motivated. I was happy just to have something to turn in. I like the ring, but it's not really resolved. At critique people liked it, but thought it could have been better, which is how I felt. I look at it as being a practice piece of sorts. I wound up getting a C+ on it. I was bummed about the C, but you can't win them all. Thankfully this project isn't weighted as heavily as the others, though this means I have to kick butt the rest of the semester. Other people made better rings, other people did worse, I was in the middle. Some people really didn't think things through- a loop for a heavy pendant that is too low will just make your pendant flip over!

The other issue I had was that cutting teeny tiny things out is hard- especially for me cause I have nerve damage in my hands. Sterling silver is softer and was more slippery to saw through then brass or copper, which didn't help. My teacher knew I was sick, but she doesn't know about my hands and I didn't want to sound like I'm copping out or making up excuses. It's frustrating.  

There's times like this that I wish I could cast things instead of fabricate them to get volume. This is one of those times. At least this ring is more comfortable/wearable than the rings I casted in the past! Those turned out big and heavy.

So I still have a bit of silver left (and really $22 isn't bad if I want to do more) so I'll have to figure out what to do with it! Maybe a pendant or another ring...

Next project? Metal boxes! Maybe I'll try another camera...


Tuesday, September 21, 2010

The Pin of E

The first assignment for my Fabricating class was to construct something out of sheet metal (copper, brass and nickel silver are your options) using rivets- lengths of tubing or wire that you hammered to make stuff stay in place.

You either had to have a moveable piece or have a depth of at least a quarter of an inch. I decided to make myself a pin using both metals and fabric- the challenge being to have them work well together. It's often difficult to mix media and have it be successful.


The original idea was to have some pieces of photos and negatives riveted in there as well but that didn't pan out. My negatives were too brittle and kept breaking since I was bending them on the curved inner piece. I think I will have to design a flatter pin in order for that to work. The wheels in my head are spinning...

Like most projects, it evolved as I went along. I do like the "E" that I sawed/drilled on the leaf on the left. I backed it with nickel silver to really show the contrast. I started with it first, then did the other leaf, pounding texture into it. I love the rolled edge on the shantung silk- that was a happy accident when I ripped a strip to make the ruffle. The second layer in is pink cotton, which frays when torn.

This is the trial look with the negatives- too busy and no real good way to rivet on a curve, so away they went. This also shows that the copper looked disgusting with the pink until I applied a patina to the metal. I bought several colors of pink fabric because I didn't know what color would look best.
 

You really never know what you're going to get with a patina- sometimes it turns out brown or purple or whatnot. This time it turned my metal black instantly, which turned out to be serandipitous. I sanded back the black so it remained in the crevices yet still left the metal purplish and not bright orange.

Here's a view from the back- I riveted the pin back on, then the leaves and then the other pieces through the middle- a challenge with the cupped in front. Riveting is always easier with two flat surfaces.


I liked how it turned out and do have plans to wear it to upcoming YSA conferences. I have a new gray blazer that I had in mind when selecting the coloring. I had critique today and it went well- mine was one of the more "complete" offerings. My teacher said that she liked this about the best of the metal work she's seen me do (she was also my teacher for Casting two years ago) because it was more personal and interesting.

I like how it combines a lot of the things that I like, that it's a rather personal pin. I love a vintage look and I love making these kind of ruffle flowers. I love fabric. And I love typeography, which is represented in the scrollwork "E". The "E" isn't terribly obvious, it's like a little secret.

It was kinda funny that so many people asked me "Why is there an "E" on your piece?" And I would have to say "Well, E is for Elizabeth" and they would feel so stupid! It's funny to me that everyone knows me as Liz out here- it's almost like having a different personality!

Wednesday, September 15, 2010

Craftyness

I've decided to mostly post the things that I make over on yar crafty blog- I don't really have the time to post things twice. So come on over and sign up! Been posting on Badvertising, too.

So come see what I did with this frame:

and these birds:


But do help me decide....what color should I paint this jewelry box?


It has a fab color of acid green inside:


And next in the line of Cheesy Plastic Stuff To Spraypaint is this large branch with butterflies...what color to paint it? White? Light blue? Aqua? Pink? Black? I just don't know.


It does look kinda cute propped up next to my bed.


Yup, that's an "E" on the wall by my bed- kinda Mary Tyler Moore, but I like it. I'm gonna make it after all.

Wednesday, June 9, 2010

Pins

So I saw this cute shirt at Wal-Mart and the upcoming conference at Kirtland was a good excuse to splurge. However, I didn’t like the band at the bottom of the shirt- who on earth thinks those are flattering? I didn’t want to look preggo, so I took some scissors and snipped it off…the beauty of knit T-shirt material is that it doesn’t unravel. I could have hemmed it, but I was lazy and it looked fine.
Ugh. I'm not preggo, really!
 That's better.


So what to do with the band? It donned on me that I could make rosette pins out of the extra fabric. It was pretty easy and fast to do. I bought some inexpensive lengths of various black laces and some black tulle to mix in.
I cut strips of the pink in various widths and then did a running stitch along one long edge. You then gather it tightly and knot it to create a rosette donut of sorts. I did the same with the lace and then played around with the layers until I liked what I saw.

I keep a variety of sizes of buttons that you cover around for such an occasion like this. I covered them with the pink material and then a lover of lace or tulle over that.

I also found some hot pink felt that was almost the exact shade of pink for the back. I hot glued all the layers together, starting with the largest “donut” and a circle of felt. I then glued the other layers on top and the button on top of it all. I then hotglued (I love the verbs I create) a pinback to the felt on the backside of the flower, thus creating a supercute pin with some 80’s influence.

For the dance, I took a strip of black tulle and used it for a belt on my flowy shirt. I wish the sleeves had been cut different so that I didn’t have to wear the black shirt underneath. It was a lot of contrast! Maybe someday when I have some time I can add some sleeves underneath the flounces so that it covers my arms better. I actually made three pins but using two looked better on my shirt- I guess I was a bit of an overachiever! I really like adapting clothes to my preferences. It was fun making these pins and I imagine more will be on the way!