Thursday, February 4, 2010

Photo 101

Here's the notes from my photo class at the conference the other weekend, it was a lot of fun to do. I really hate seeing people's lousy FB photos, so it was kindof a public service announcement! Afterwards people kept teasing me or others when they were taking a picture..."Watch your background!", etc. Ha ha. So here we go...

Remember:


You don’t take a picture, you make a picture!


You're in control far more than you realize when taking a photo.


We live in a digital world where it is so easy to see what you've just shot, but digital kinda makes it easy to be sloppy. Actually look at your screen and make corrections- there's no excuse for poles coming out of heads, closed eyes, blurry shots, etc! And I see this all the time!

A lot of people are scared of taking photos, but it doens't have to be overwhelming. A lot of people think that you have to have some fancy camera to have good photos, but that isn't true. Sure, it's nice to have a good camera to have some image quality, but YOU are the brains behind your camera. A camera is simply a tool that records an image using light. YOU tell it what to record. You should have seen the low-tech film camera I had on my mission- it was like using a disposable camera! But I still got pretty good photos because I trained my eye.


· Get to know your camera, read the manual! Try out your settings, then you will be prepared instead of having to fiddle with your camera and miss your shot!


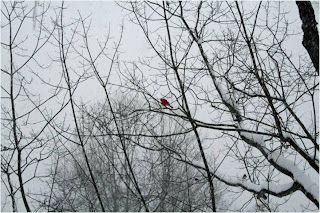
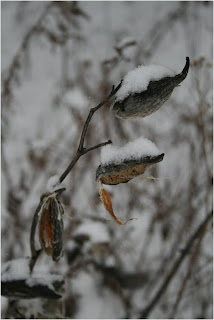
· Determine what your subject is- it should be apparent to others. There's a cardinal in that photo somewhere, really:
For this example, instead of being far away, I got in close so you'd know the flowers are my subject:
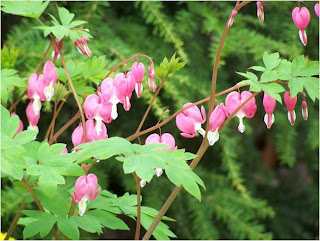


You can also blur your background to show emphasis, that way we're not distracted by what's in the background. You can do this a number of ways- use your portrait mode, use a wide aperture or fudge it in Photoshop later. I took this uing a wide aperture on my DLR:


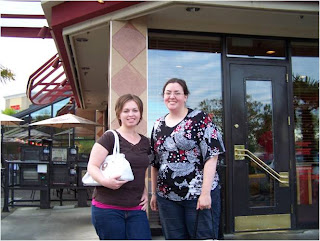
· Watch your background. A lot of people forget that what's in the background winds up in their picture too! The example below is an example of a ho-hum, distracting background. I love Stef and all, but the building is distracting and there's a vertical line "splitting" us. The diamonds behind Stef's head aren't helping.


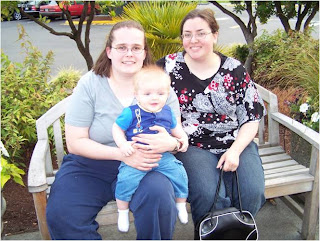
These photos were taken minutes apart. We turned around and discovered the bench made a better picture spot. Is it perfect? No, there's cars in the upper corner. But it's definitely better than our first instinct!


· Turn off your flash! Often you don't need your flash, and it makes interiors look like caves: Your flash only travels 10-15 feet, so it won't illuminate past that. Sometimes you just can't get away from using your flash, but try not to. Train to hold your camera real still, I also reccommend investing in a tripod, they're not that expensive. Using available light is much more pleasing to the eye:
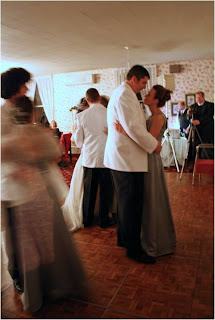


Both of those photos were taken at the same event, what a difference! Motion blurs aren't always a bad thing.


· Watch for edge distractions. Little things along the edge can distract the viewer or lead their eye out of the photo. This photo has some gutter hanging into the top right corner of the photo, which detracts from the barn background. Cropping that out (whether in camera or later in Photoshop) will make that much better.
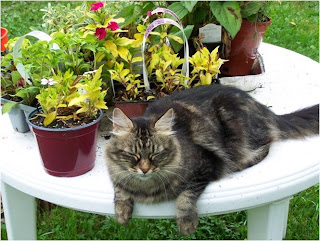
Here with my kitty Zebby (isn't she cute?), there are elements that lead your eye right out of the photo. Note the table legs tapering down, they just form arrows that point your eye out of the photo. Zebby's tail isn't helping either. I'm not saying that you can't crop anything in your photo, but just be careful how you do it.


· Take lots of pics to improve your odds of a good one, especially when dealing with pets or children! Digital makes it easier, but practice helps!

· Avoid having images/writing on your clothing when posing for a nice photo- It's way too distracting to the viewer. I really dislike seeing engagement photos, etc with writing all over their shirts! Besides, it just dates your photo.

· Turn off the time/date stamp- too distracting! I really hate seeing that on photos and no one will take you seriously as a photographer if you have that on!

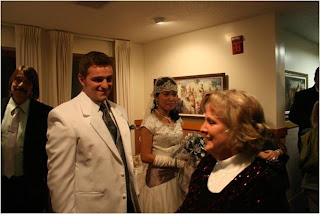
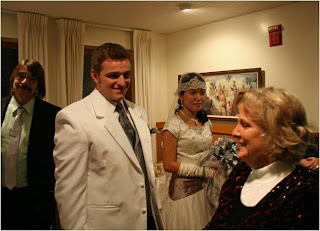
· Cropping: Cropping out unessesary elements can help show what the emphasis is. Crop on a copy of your photo, not the original photo or photo file. In this photo of Dan & Sissy, there's too much ceiling and the greenish hallway on the right isn't helping either:
By cropping, we show what's important to this photo: Dan and Sissy greeting their guests.


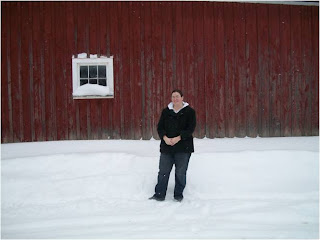
  • Cropping people: When cropping a person, you want to avoid cropping at a joint- it looks like they've lost an appendage! I cropped this photo of me right at the knees and it looks like my legs have been cut off...ouch!
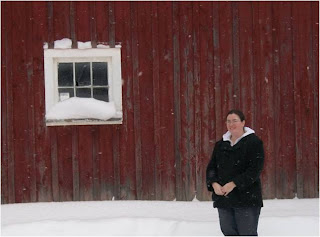

A way to avoid this is to crop between joints- crop in between your subject's knee and ankle instead of right at the joint. Same goes for arms!


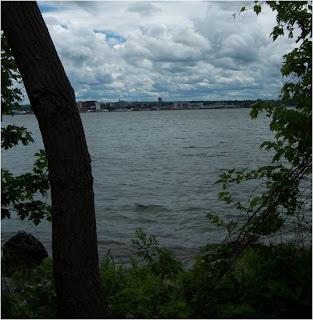
· Use the Rule of Thirds to have a more interesting composition. Our brains want to organize everything on an imaginary grid- very linear. If we "break up" that grid, our photos will be much more interesting. And where do we usually place our subject? Smack dab in the middle! I'm not saying that you can't do that, but your photo will be more interesting if the subject's not in the middle of your photo.

In this example, the horizon line is smack dab in the middle...when you divide your photo (or artwork) in half, it becomes boring.
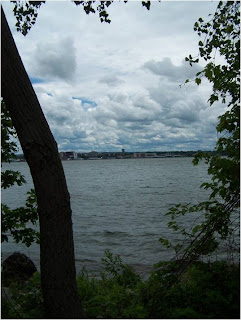


By adjusting the main "lines" in your photo to fall on imaginary 1/3 lines (draw an imaginary tic tac toe board over your photo, those are the lines you're aiming for but it doesn't have to be exact), you can improve your photo. I cropped this photo to be 1/3 sky and 2/3 water, but I could have done it the other way around. Also note that the left tree falls on the vertical 1/3 line instead of being in the middle.
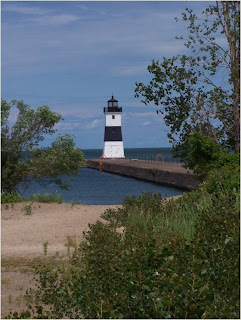


· Compose an imaginary triangle: Yes, this lighthouse is in the middle of the picture, but I compenate for that by having a "triangle" of elements (the trees) that serve to break up that imaginary grid i was talking about. This also works when photographing people- instead of lining up everyone "mug-shot" style, arrange people at different heights for more interest. Angles are more visually interesting than straight lines.

· Take photos near and far: What does Grover say? Near and Far, no? Well, let that be a reminder when taking photos. You want to take photos from a range of distances- close ups, mid range and far away. That way you can see details a well a get a sense of the whole space or context of the photo. When I shoot weddings, I take lot of close ups- cake, dress, flowers, etc...I take mid range photos and I make sure that I get shots of the whole room for context.

Near:
Mid-range:
Far away:
Oh, and I always really hate it when I see scrapbook pages where the pic of the kid is cropped in so tight that all you see is their face, yet the page is about playing outside or something...make sure your viewers can see the context of the photo.

· Use or create diffused lighting : Do you know why I love being photographed in SF? Because I always look good...cause of the lighting! The fog creates diffused lighting, which is always more flattering than a harsh, direct light source (aka the sun). People commonly think that they need a bright sunny day to take photos outside, but that just leads to weird shadows and squinty people in your photos. Aim for an overcast day.
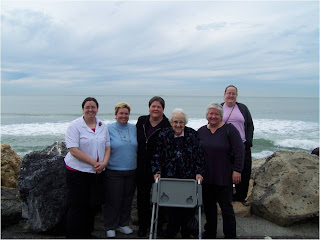


Photographing in snow is another option, as the light being reflected off the snow bounces at your subject from all angles, giving you more even lighting. If you don't have an overcast day, you can create one- make your flash fire to fill in shadows, or make or buy a white reflector that will reflect light into the shadows of your subject. All it takes is a white piece of cardboard used jut out of your camera's frame. Or use a black piece of cardboard to remove light.

There are also products that diffuse the pop-up flashes on cameras or if you want to be more peofesional you can buy a len mount that hold your flash away from your DSLR for more diffused lighting.

You really do make or break a photo with lighting- you can take the simplest thing and it can be interesting if well lit. And you can take something interesting and ruin it with crappy lighting.

· Adjust your white balance to avoid dingy photos. Cameras see things different from our eyes. We often don't see the color casts that come from man-made lighting, but your camera will sure pick it up. This was taken without a flash at Dan & Sissy's wedding, and the lighting turned everything so yellow:
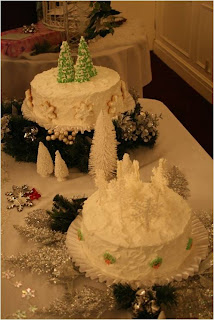
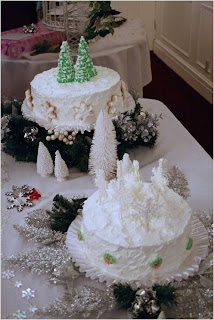
Afterwards I tweaked it in Photoshop Element and what do you know! Their cake was white!


You can alter the white balance in your camera (read your manual!) if you know you are going to be shooting under flourescent lighting, etc, or you can fix it later like I did. It really makes a difference! I think I did it by going to Enhance>Color>Remove Color Cast. Then you click on what is supposed to be black, white or gray and it adjusts everything. So easy!

· Take photos on the same level as your subject instead of looking down at them. This is really prevalent when photographing pets, children, flowers, and basically anything shorter than you. Who wants a picture of the top of their kid's head? It just makes your subject look like a bobblehead, like Lars:
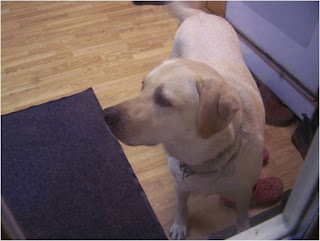
So snap-crackle-pop and bend down to your subject's level and you'll actually see their face instead of the top of their head. Most photos are taken at eye level, that's approximately 5 feet off the ground. If you shoot well above or below eye level, it can be more interesting. Anyhow, I crouched down, and now you can see Hanky and it's nice to have his front paws be relatively proportionate to his head instead of tiny like Lars':
I will say that if you crouch down and shoot your camera up at your subject, you just give them a big double chin, so don't do that.

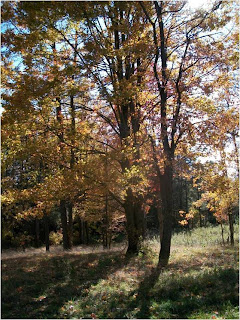
· Take the time to explore for the best composition. If you've got the time, then explore your best options. I had the time when photographing these trees, so I walked around in the woods and got much better photos than if I had taken the easy way and stayed on my driveway. The lighting was much better coming from in the woods than the flat lighting that I had on easy street.
· Have your photos tell a story: What I mean is that if you are showing a collection of photos of say, a trip or an event or whatnot, then have them relay what happened. Have you ever been thrown into someone's Facebook album and not known what the heck was going on? I'm not aying that you have to take stop-motion photography every.04 seconds, but try to make sure that they make sense to your viewer.
For example, when I travel I like to take a shot of my kitty Cindy "helping" me pack(she likes suitcases!), then maybe I pose with family at the airport or I take a shot out the airplane window, and then on from there.

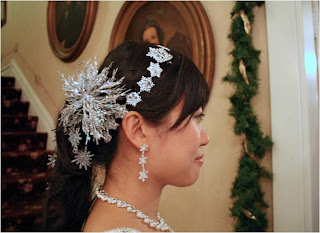
· Gaze: It's really disconcerting for there not to be any space for a person to "look" into. I cropped Sissy below, see what I mean?
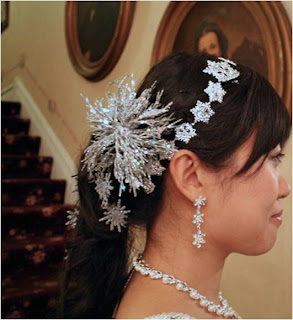


Ahh, much better:


· Body Language: Make sure that your body language matches what you are trying to say in your photo. I've seen way too many engagement photo of people posing with their back to each other and then it makes you wonder if they really like each other!

Also, be careful when posing with your arm around someone...sometimes there's "Phantom Hand Syndrome" where it looks like the hand on someone's houlder isn't connected to anyone! Don't let Thing from the Addams family be in your photos!


· You’re only as strong as your weakest image- it’s ok to edit out bad or redundant photos! This is true whether youre a pro with a portfolio, if you're putting a photo album together or poting to FB! Seriously, you don't have to show every photo on FB! I get tired of seeing essentially the same shot over and over and over (like with weddings). Pick the best, post it and move on!

And as a final nag, take care of your photos! Read my post about archival preservation if you have questions. At the very least, back up your photos! Don't let a sob story happen to you!


Anyhow, that's it for now. Hope sharing this info doesn't put me out of a job! Ha ha.

Tuesday, January 26, 2010

Jamestown Conference

Last weekend was our third annual Jamestown NY Stake YSA conference. We keep trying to plan things early and each year planning goes awry, but things went really well this weekend. It's just hard planning when you have the holidays and planning sessions canceled due to snow right when it's crunch time. Laura and I were the most consistent YSA planners, a few others helped but not as much. Let's just say I slept really well when it was all done!


Instead of having things at the stake center and farming people out to member's homes, this year we decided to try having everyone camping in cabins, which worked out well. Camp Hawthorne Ridge is not far from school so I was happy to have a short commute. It also didn't make sense to have everyone drivel up to Jamestown when they are coming from the South- no one would be coming from Buffalo or someplace like that. Everyone rolled in from Pittsburgh, Ohio and West Virginia.


Friday night was spent playing board games, we served yummy food and just wanted people to have fun chatting and relaxing. People roll in at all hours of the night, so it's hard to do much else. People had fun, they stayed up late chatting and playing.


On to Saturday:


We had breakfast and then classes, I taught about easy things to improve your photography. I put together a Powerpoint presentation that I'll share more about soon. It was a lot of fun to teach and I got a good response. We had another good class about Cooking on a Budget and then then Brother Trusel taught about Dry-Pach Canning with the help of his lovely assistant, Bertha (aka Betsy his wife, she does this bag lady bit that is hysterical!).


We didn't know if everyone would be excited to do their own can of rice but they were!


The Strassbergs from the Palmyra temple also came and spoke, they were great. I've gotten to know them from my recent trips to the temple (for Rene and then Dan & Sissy's sealing) so I really enjoyed having them there.


We had an ice carving demo from Bro Alexander, I didn't know if people would care but they loved it!


Had fun at freetime, went to Presque Isle, which is just so lovely anytime of the year. I tried out my new DSLR. Part of Lake Erie was frozen!


Cute houseboats:


Gotta love lighthouses:


Ice dunes were neat!


Then we rushed back for dinner and our 80's dance! I wished the dance had gone a bit better (I think I would have been a better dj) but it was still fun!


All of my outfit is new, it's hysterical to me how 80's influenced everything is these days!


Me and my friend Anne:

After the dance, the boys had built a bonfire by their cabin and invited us girls, I had to laugh at their macho attempt to impress us. Because being a pyro is so attractive, lol.

On Sunday, we had sacrament meeting in the main cabin, which was interesting. The Strassbergs spoke more about temples (very lovely) and then we had a really nice testimony meeting. Then it was time to grab some food and go home!


Me and my friend Levi (I tease him about being a vampire, lol)

I did not get much sleep this weekend- all us girls were crammed in our cabin and it was not restful! I came home, slept like a log for hours, ate dinner and then went right back to bed! And I was still tired come Monday morning!
In all, everyone gave us rave reviews, which was great. I tried really hard to make things more fun/better than the other conferences that I've traveled to. We had some spoilsport girls from our stake who couldn't just have fun (Odds are you will *not* meet Mr. Right at this shindig, get over it! Like they're gonna want you anyhow when you three were so snotty!) and went home early but they were the only ones and really nothing would please them. Other people who left early did so for callings, baptisms, etc, not because they weren't having fun. In all we had about 50 YSA, a great number. I don't know how we'll top it but we'll try next year!
Stay tuned for my Photo 101 class!


Friday, January 22, 2010

Winter Break

I had a fairly decent New Year's, I spent the evening with a few YSA and our leaders. There were more leaders than us, but we had a good time playing games and stuffing our faces. Everyone wore a party hat or crown. It was fun to watch the New Year's countdown on tv cause I haven't watched that in a couple years (we don't have tv!). But where did I really want to be? At the big fancy New Year's dance in Seattle with my friends. I scoured around but none of the other "nearby" {snort} stakes out here were doing anything.


Laura, me, KL and Michelle:


Hank was festive too:


After New Year's, it snowed a TON! Like feet of snow in a couple of days. I went a little (okay, a LOT) crazy from cabin fever but managed to get out a couple of times. It also didn't help that my family kept passing several diseases around so you were either sick or tending to someone else.


Cemetery in Erie:

Laura with Grant in Erie


Snowy berries:


This barn by the post office is a good backdrop:

Laura feeding the neighbor's swan & ducks:


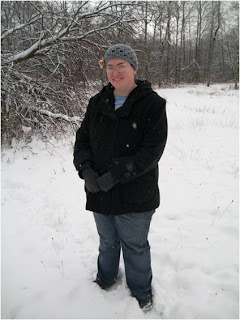
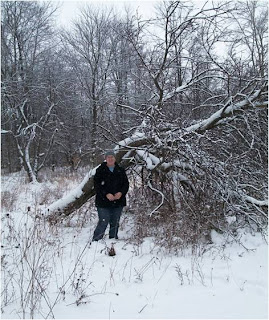
Me by the fallen apple tree:

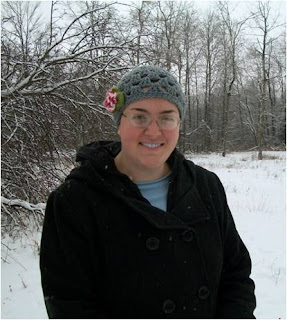
Don't you love my new hat? Gotta love clearance at Fashion Bug! I wear it all the time. And I'm not a hat person!


Since these photos, our snow has condensed down to six inches of grainy ice, it's become quite hazardous to your health to walk outside. I really like my ice cleats! It's all dirty out too, no more clean pretty snow. I am starting to become Eskimo-like with all the different words for snow that I now have!
Break was also spent planning final preparations for our YSA conference...which we are hosting this weekend! A lot to do since there are so few YSA in our stake these days, but I think we'll have fun. Stay tuned for pics and wish me luck!


Thursday, January 21, 2010

How I Roll

Stole this from Angela. Here are the rules: Bold the things you’ve done and post on your blog!

Started your own blog
Slept under the stars
Played in a band (EHS junior high band, I'm so cool!)
Visited Hawaii
Watched a meteor shower
Given more than you can afford to charity
Been to Disneyland (5 times! I want to go now!)
Climbed a mountain
Held a praying mantis
Sang a solo (Does singing a duet count?)
Bungee jumped
Visited Paris
Watched a lightning storm at sea
Taught yourself an art from scratch
Adopted a child (someday!)
Had food poisoning(ugh!)
Walked to the top of the Statue of Liberty
Grown your own vegetables (so yummy!)
Seen the Mona Lisa in France
Slept on an overnight train (going from WA to CA when I was a kid...my first rejection from a boy...so romantic, lol)
Had a pillow fight
Hitch hiked
Taken a sick day when you’re not ill (my dad wanted me to so we could see tall ships!)
Built a snow fort
Held a lamb
Gone skinny dipping
Run a Marathon
Ridden in a gondola in Venice
Seen a total eclipse
Watched a sunrise or sunset
Hit a home run
Been on a cruise
Seen Niagara Falls in person
Visited the birthplace of your ancestors(does visiting my birthplace count?)
Seen an Amish community (everyday occurance here!)
Taught yourself a new language
Had enough money to be truly satisfied
Seen the Leaning Tower of Pisa in person
Gone rock climbing
Seen Michelangelo’s David
Sung karaoke
Seen Old Faithful geyser erupt
Bought a stranger a meal at a restaurant
Visited Africa
Walked on a beach by moonlight
Been transported in an ambulance
Had your portrait painted
Gone deep sea fishing
Seen the Sistine Chapel in person
Been to the top of the Eiffel Tower in Paris (someday!)
Gone scuba diving or snorkeling
Kissed in the rain
Played in the mud
Gone to a drive-in theater
Been in a movie
Visited the Great Wall of China
Started a business
Taken a martial arts class
Visited Russia (I had a pen pal from there, does that count?)
Served at a soup kitchen
Sold Girl Scout Cookies(well, Campfire candy...)
Gone whale watching
Got flowers for no reason
Donated blood, platelets or plasma
Gone sky diving
Visited a Nazi Concentration Camp
Bounced a check
Flown in a helicopter
Saved a favorite childhood toy
Visited the Lincoln Memorial
Eaten Caviar
Pieced a quilt
Stood in Times Square
Toured the Everglades
Been fired from a job (Old Navy didn't keep me on after Christmas 2001)
Seen the Changing of the Guards in London
Broken a bone
Been a passenger on a motorcycle
Seen the Grand Canyon in person
Published a book
Visited the Redwoods
Bought a brand new car
Walked in Jerusalem
Had your picture in the newspaper
Kissed a stranger at midnight on New Year’s Eve
Visited the White House
Killed and prepared an animal for eating
Had chickenpox
Saved someone’s life
Sat on a jury
Met someone famous
Joined a book club
Got a tattoo
Had a baby
Seen the Alamo in person
Swam in the Great Salt Lake
Been involved in a law suit


Hmmm...I turned into a fuddy-duddy at the end. There you go. I want to see the sights/art that they describe here real bad!

Wednesday, January 20, 2010

I {heart} Christmas

Yeah so this post is a wee bit late. Get over it! I don't have internet access at home while I'm on break and I love posting about Christmas. Maybe one of these days I'll come to grips that it's 2010!


Anyhow, I probably should've showed this before Christmas, but maybe you remember this and do it next year. It's a fun photo trick, anyhow. I learned how to do this way back when I was in photo class but was reminded recently on Color Me Katie here and here.


I am magic, I have turned my tree into hearts!


So how did I do this? Easy. You do have to have a manual camera, though. You cut a heavy piece of paper to fit your lens, then cut a little heart or whatever shape you want in the middle. The heart I cut was only a quarter of an inch big. Set up your tripod, set your camera to manual focus, and adjust until you see hearts (or stars, lol!). Have fun!